When creating your worksheet you cannot avoid making mistakes like omitting an entries. Although you can move the following rows and columns to leave an empty space where you can insert the omitted entries, it’s not an ideal method when using Excel.
Microsoft Excel makes inserting and deleting rows or columns easy, and this lesson will teach you how.
Inserting Row or Column
To insert row or column, position the active cell where you want to insert the row or column, please take note that the row will insert above the selected cell and the column will insert at the left of the selected cell.
When you already position and selected the cell where you want to insert the row or column, go to the ribbon, on the Home tab, Cells group, click the arrow below the Insert control to open the drop-down list, click the “Insert Sheet Rows” to insert row and click “Insert Sheet Columns” if you want to insert column.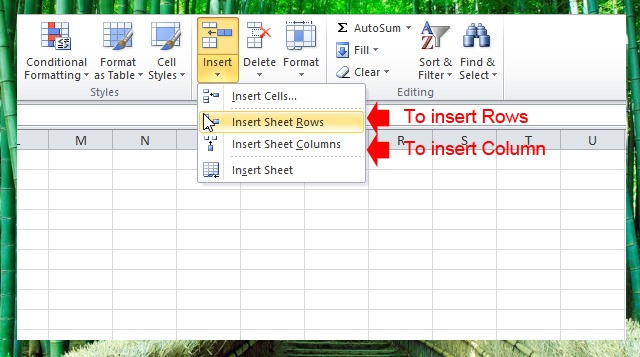
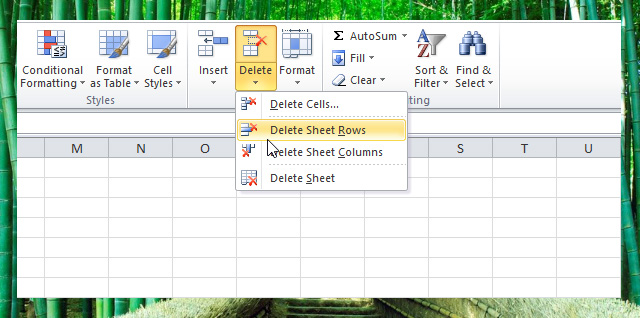
Deleting Row or Column
Deleting rows and columns in Excel works similar to inserting, select the row or column that you want to delete, then on the Home tab, Cells group, click the arrow below the Delete control to open the drop-down list, click the “Delete Sheet Rows” to delete the row and click “Delete Sheet Columns” if you want to delete the column.