Capturing screenshots is an essential function for many users, whether for work, school, or personal use. One of the most useful tools for this is the Snipping Tool, a built-in feature in Windows that allows you to capture specific parts of your screen easily. While you can open the Snipping Tool manually, using keyboard shortcuts makes the process significantly faster and more efficient.
In this comprehensive guide, we will cover everything you need to know about Snipping Tool shortcuts, including how to use them, customize them, and troubleshoot common issues.
What is the Snipping Tool?
The Snipping Tool is a screenshot utility that comes pre-installed in Windows operating systems. It allows users to capture a portion of their screen and save or edit it before sharing. Over time, Windows has improved the tool, integrating it with Snip & Sketch in Windows 10 and later versions.
Default Snipping Tool Shortcuts
To speed up your workflow, you can use the following keyboard shortcuts for the Snipping Tool:
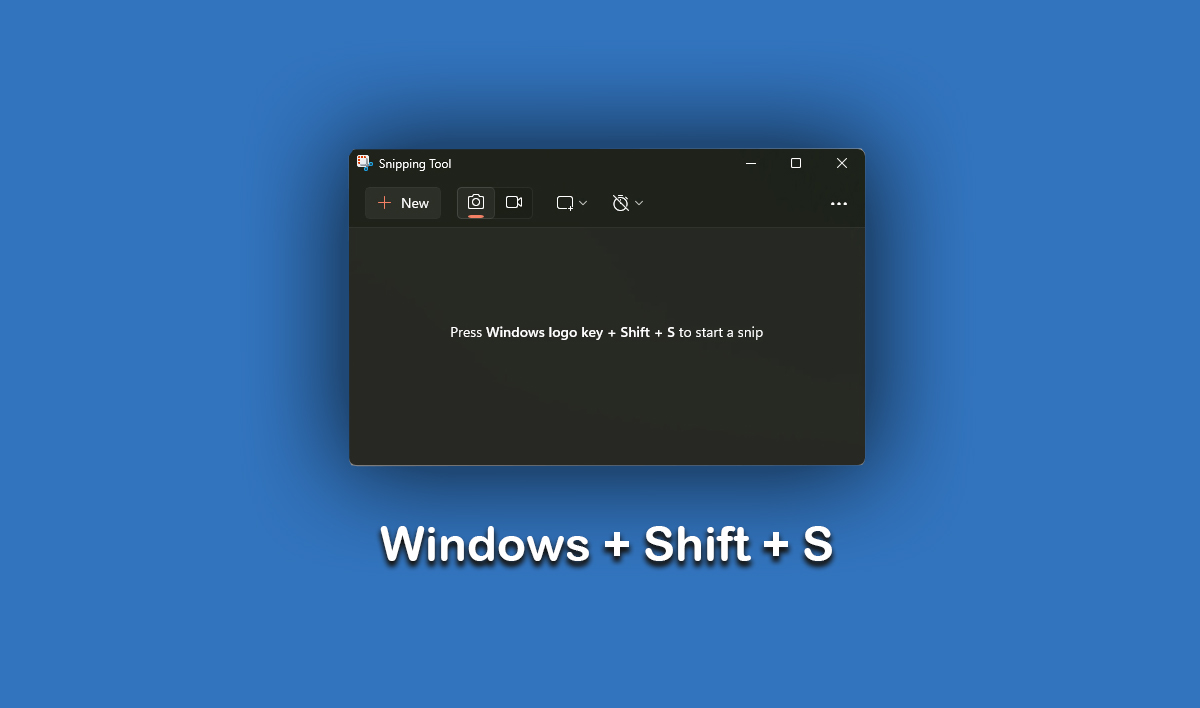
- Open Snipping Tool:
Windows + Shift + S - Capture Full-Screen Snip:
PrtScn(Print Screen) - Capture Active Window:
Alt + PrtScn - Capture a Specific Region:
Windows + Shift + S, then click and drag - Copy Snip to Clipboard:
Ctrl + C - Save Snip:
Ctrl + S - Annotate with Pen:
Ctrl + P
How to Use the Snipping Tool Shortcut
1. Using Windows + Shift + S
This is the most commonly used shortcut to activate the Snipping Tool quickly:
- Press
Windows + Shift + S. - Your screen will dim, and a toolbar with four snipping options will appear at the top:
- Rectangular Snip: Capture a specific rectangular area.
- Freeform Snip: Draw a custom shape around the area you want to capture.
- Window Snip: Select a window to capture.
- Full-Screen Snip: Capture the entire screen.
- After selecting your desired option, the captured image is copied to the clipboard.
- Open any image editor (e.g., Paint, Word, or Photoshop) and press
Ctrl + Vto paste the screenshot.
2. Using PrtScn and Alt + PrtScn
- PrtScn: Captures the entire screen and saves it to the clipboard.
- Alt + PrtScn: Captures only the active window.
These shortcuts are useful when you need a quick full-screen capture without using the Snipping Tool interface.
Customizing Snipping Tool Shortcuts
While Windows does not allow changing the default shortcut (Windows + Shift + S), you can create a custom shortcut to launch the Snipping Tool:
- Locate the Snipping Tool:
- Search for “Snipping Tool” in the Start menu.
- Create a Shortcut:
- Right-click on “Snipping Tool” and select “Open file location.”
- Right-click the executable file and choose “Create Shortcut.”
- Assign a Keyboard Shortcut:
- Right-click the new shortcut, select “Properties.”
- Click on the “Shortcut” tab.
- In the “Shortcut key” field, enter your preferred shortcut (e.g.,
Ctrl + Alt + S). - Click “Apply” and “OK.”
Now, you can use your custom shortcut to launch the Snipping Tool quickly.
Troubleshooting Common Snipping Tool Issues
Sometimes, the Snipping Tool shortcut may not work as expected. Here are some solutions:
1. Enable Clipboard History
If screenshots do not save correctly, ensure clipboard history is enabled:
- Go to Settings > System > Clipboard.
- Turn on Clipboard History.
2. Restart the Snipping Tool
If Windows + Shift + S is unresponsive:
- Open Task Manager (
Ctrl + Shift + Esc). - Find Snipping Tool under “Processes.”
- Right-click and select End Task.
- Reopen the Snipping Tool.
3. Check Windows Updates
Sometimes, Windows updates may interfere with shortcuts. Ensure your system is up to date:
- Go to Settings > Update & Security > Windows Update.
- Click Check for updates.
4. Reinstall the Snipping Tool
If issues persist, reinstalling the tool can help:
- Open Settings > Apps > Apps & Features.
- Find Snipping Tool or Snip & Sketch.
- Click Uninstall, then reinstall from the Microsoft Store.
Alternative Screenshot Tools
If the Snipping Tool does not meet your needs, consider these alternatives:
- Snagit – Advanced editing features, great for professionals.
- Greenshot – Free and open-source, with powerful annotation tools.
- Lightshot – Lightweight and easy to use.
- PicPick – Combines screen capturing with image editing.
Conclusion
The Snipping Tool shortcut (Windows + Shift + S) is an essential feature for quickly capturing and editing screenshots. Learning and customizing these shortcuts can greatly improve your workflow, whether you’re a student, professional, or casual user.
By following this guide, you can maximize the efficiency of the Snipping Tool, troubleshoot common issues, and even explore alternative tools if needed.
Read Also: Get Help with Notepad in Windows: A Comprehensive Guide