Microsoft Excel is not just for basic calculations—it can also help you solve complex decision-making problems. One of its most powerful tools is Solver, which allows you to find the best possible result by adjusting values based on rules you set.
In this guide, you’ll learn how to use Solver in Excel with clear, step-by-step instructions, so you can easily follow along even if you’re new to it.
What is Solver in Excel?
Solver is an optimization tool that helps you:
- Maximize a value (like profit)
- Minimize a value (like cost)
- Or set a value to a specific number
It works by changing selected cells (called variable cells) while following conditions (called constraints).
How to Use Solver in Excel
Step 1: Enable Solver in Excel
Before using Solver, you need to activate it.
Enable Solver in Excel (Windows)
- Open Microsoft Excel
- Click File
- Click Options
- Select Add-ins
- At the bottom, find Manage: Excel Add-ins, then click Go
- Check Solver Add-in
- Click OK
After this, go to the Data tab and you will see the Solver button.
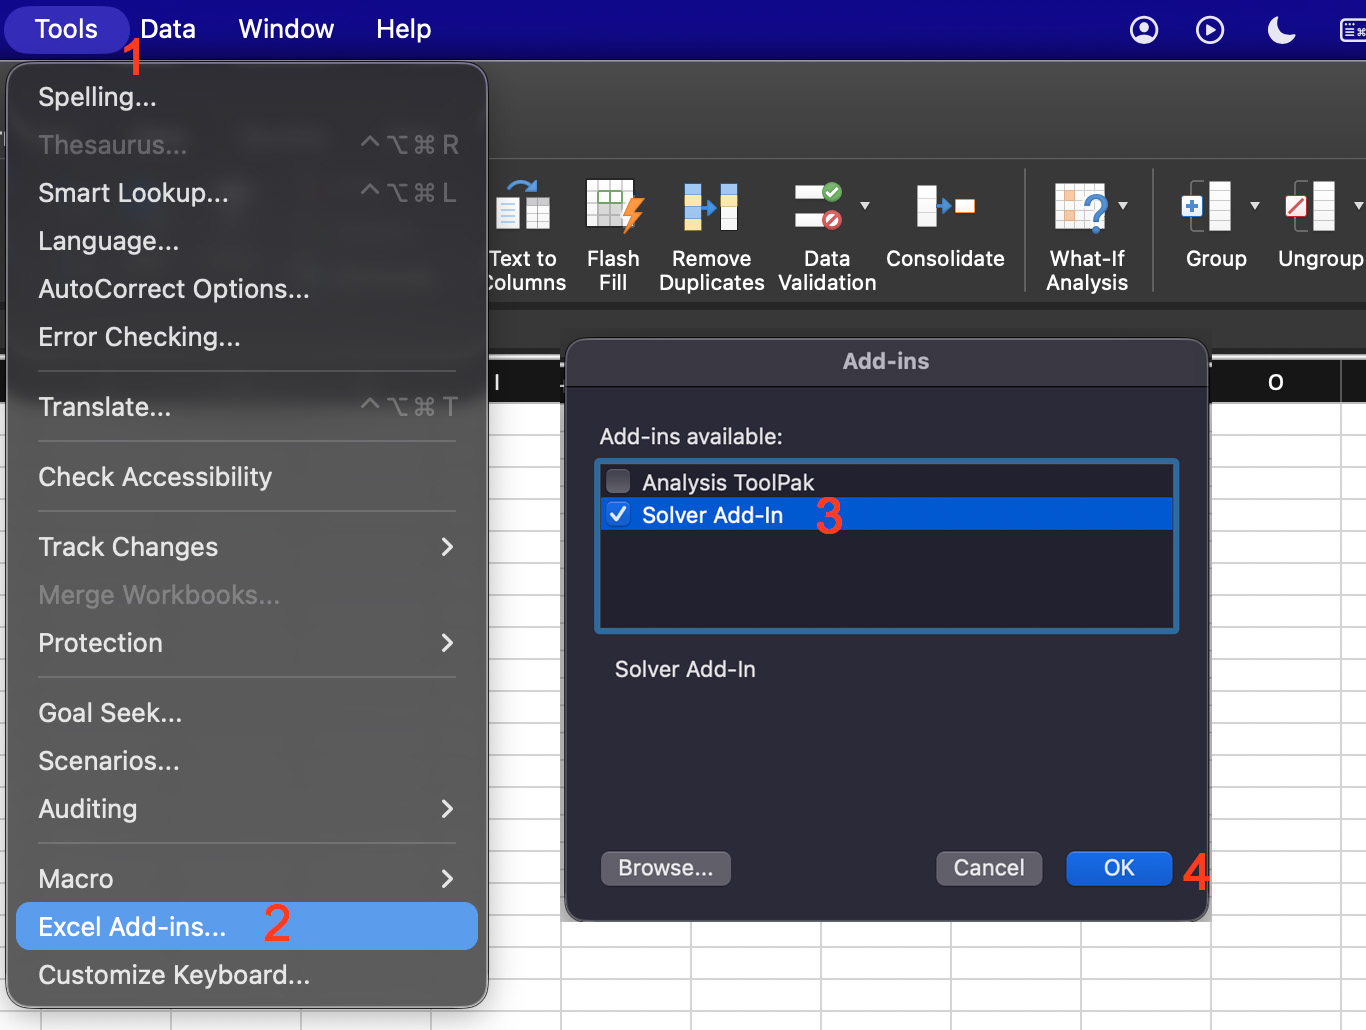
Enable Solver in Excel (Mac)
If you are using Excel on a Mac, the steps are slightly different.
- Open Microsoft Excel
- Click Tools in the top menu
- Select Excel Add-ins
- In the Add-ins window, check Solver Add-in
- Click OK
Once enabled, you can find Solver under the Data tab, just like in Windows.

Step 2: Prepare Your Data (Example Setup)
Let’s create a simple example where you want to maximize profit.
Problem:
- Product A profit = 50 per unit
- Product B profit = 40 per unit
- Total production limit = 100 units
- Product A must be at least 10 units
Enter this in Excel:
| Cell | Description | Value |
| A1 | Product | |
| B1 | Units | |
| C1 | Profit/Unit | |
| A2 | Product A | |
| A3 | Product B | |
| B2 | Units A | 10 |
| B3 | Units B | 10 |
| C2 | Profit A | 50 |
| C3 | Profit B | 40 |
Create Total Profit Formula
In cell B5, enter:
= (B2*C2) + (B3*C3)
This cell (B5) is your objective cell.
Step 3: Open Solver
- Click the Data tab
- Click Solver
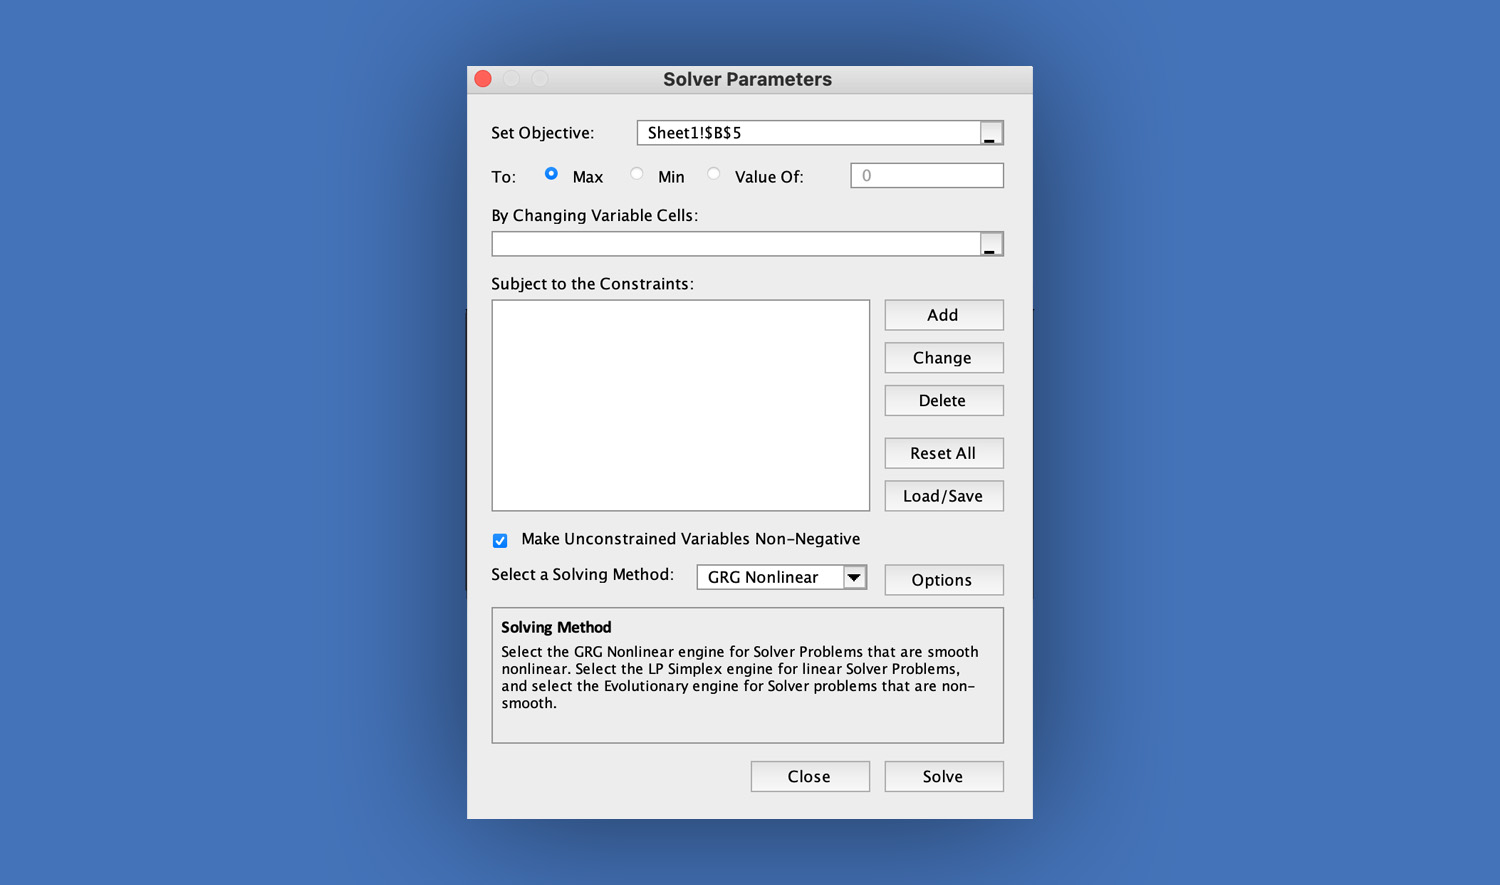
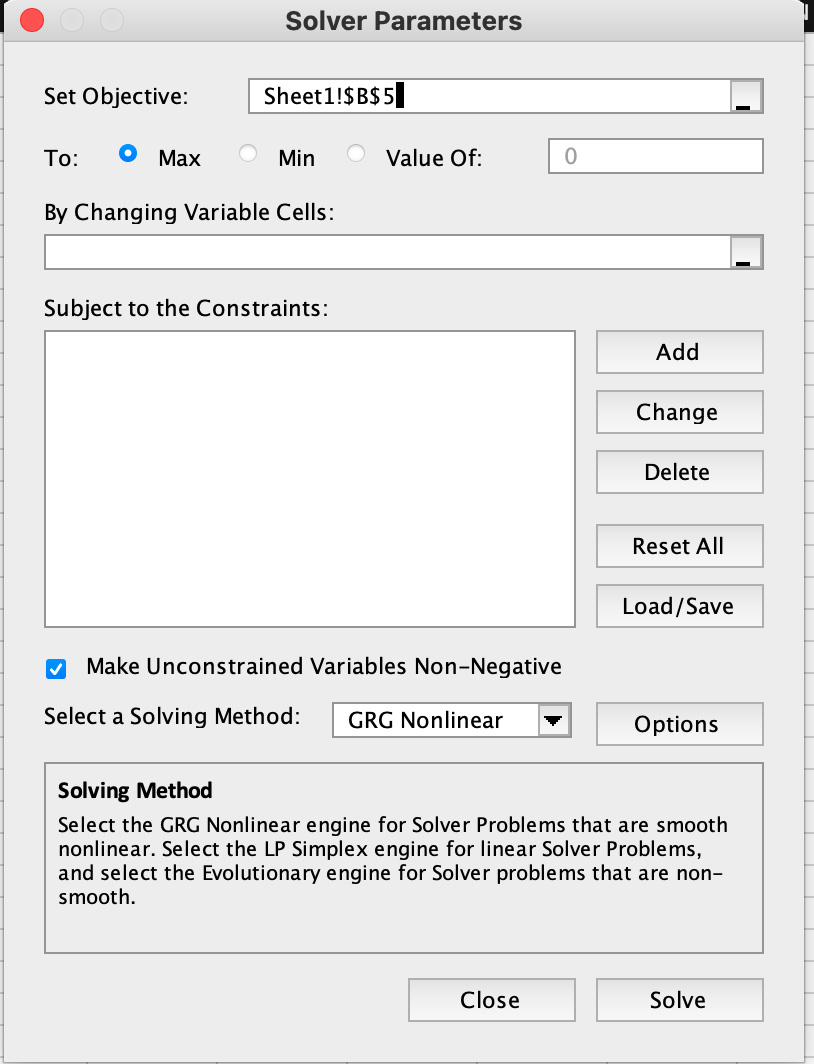
The Solver Parameters window will appear.
Step 4: Set the Objective
Inside the Solver window:
- In Set Objective, select cell B5 (total profit)
- Choose Max (since we want to maximize profit)
Step 5: Select Variable Cells
In By Changing Variable Cells, select B2:B3 (these are the number of units for Product A and B)
Step 6: Add Constraints (Important Step)
Click Add and enter the following constraints one by one:
Constraint 1: Total Units Limit
If you have a helper cell (e.g., B6 = B2 + B3), then:
- Cell Reference: B6
- Relation: ≤
- Value: 100
Constraint 2: Minimum for Product A
- Cell Reference: B2
- Relation: ≥
- Value: 10
Constraint 3: No Negative Values
- Cell Reference: B2:B3
- Relation: ≥
- Value: 0
Click OK after adding all constraints.
Step 7: Choose Solving Method
At the bottom of the Solver window:
- Select Simplex LP (best for linear problems like this)
Step 8: Solve the Problem
- Click Solve
- Wait for Excel to process
- Select Keep Solver Solution
- Click OK
Step 9: Check the Results
After solving:
- Cells B2 and B3 will change automatically
- These values represent the best number of units to produce
- Cell B5 will show the maximum profit
Step 10: Save or Reuse the Model (Optional)
If you plan to use Solver again:
- Click Solver
- Click Load/Save
- Save your model setup
This allows you to reuse your constraints and settings later.
Tips for Beginners
When using Solver for the first time, always double-check your formulas before solving. Even a small mistake in your formula can lead to incorrect results. It also helps to use helper cells for totals or limits, as this makes constraints easier to manage.
If Solver doesn’t give the expected result, review your constraints carefully. Missing or incorrect constraints are the most common issue.
Conclusion
Now that you know how to use Solver in Excel step by step, you can start solving real-world problems more efficiently. Whether you’re trying to maximize profit, minimize expenses, or find the best combination of values, Solver makes the process faster and more accurate.
With practice, you’ll be able to apply Solver to more advanced scenarios and make better data-driven decisions using Excel.
Read Also: How to Use Goal Seek in Excel: Step-by-Step Guide with Example