Protecting your Excel files is essential when you’re working with important data, formulas, or confidential information. Whether you want to prevent accidental edits or restrict access to certain parts of your spreadsheet, Excel provides built-in tools to help you secure your workbooks and worksheets effectively.
In this guide, you’ll learn how to protect workbooks and worksheets in Excel, including practical steps, examples, and best practices to keep your data safe.
Why Protect Workbooks and Worksheets?
Before diving into the steps, it’s important to understand why protection matters. Excel protection helps you:
- Prevent accidental changes to formulas and data
- Restrict unauthorized access to sensitive information
- Maintain the integrity of reports and financial models
- Control what other users can edit or view
Protection is especially useful when sharing files with colleagues, students, or clients.
Understanding Workbook vs Worksheet Protection
Excel offers two main types of protection:
1. Workbook Protection
This protects the structure of your file, such as:
- Preventing users from adding, deleting, or renaming sheets
- Restricting moving or copying worksheets
2. Worksheet Protection
This controls what users can do inside a sheet, including:
- Editing cells
- Changing formulas
- Formatting data
How to Protect a Worksheet in Excel
Protecting a worksheet is the most commonly used feature. Here’s how to do it:
Step 1: Open Your Excel File
Open the workbook that contains the worksheet you want to protect.
Step 2: Select the Worksheet
Click the sheet tab at the bottom of the screen.
Step 3: Go to the Review Tab
Navigate to the Review tab on the ribbon.
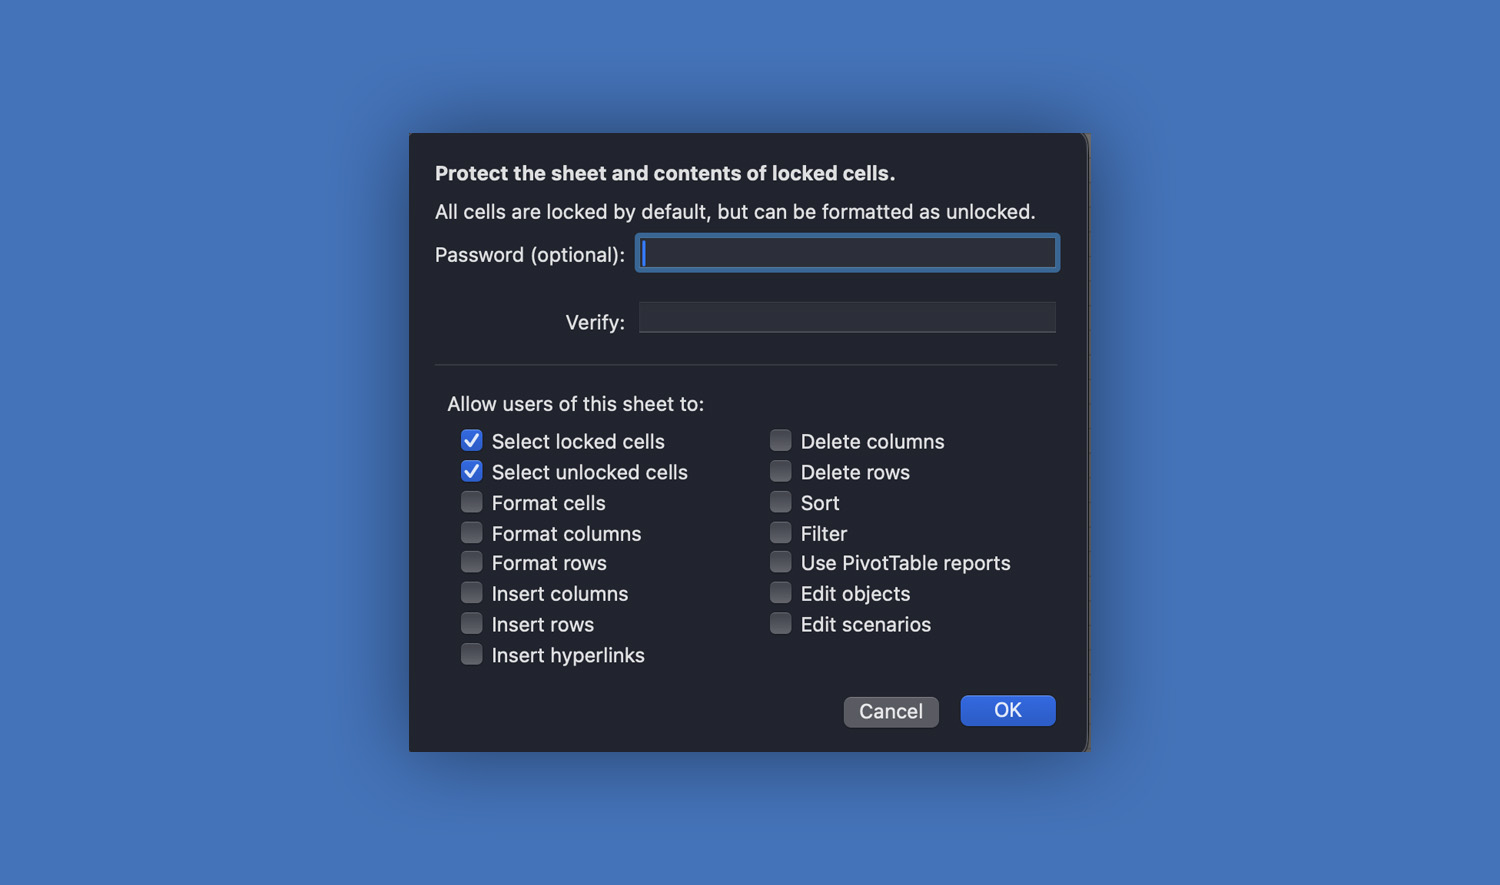
Step 4: Click “Protect Sheet”
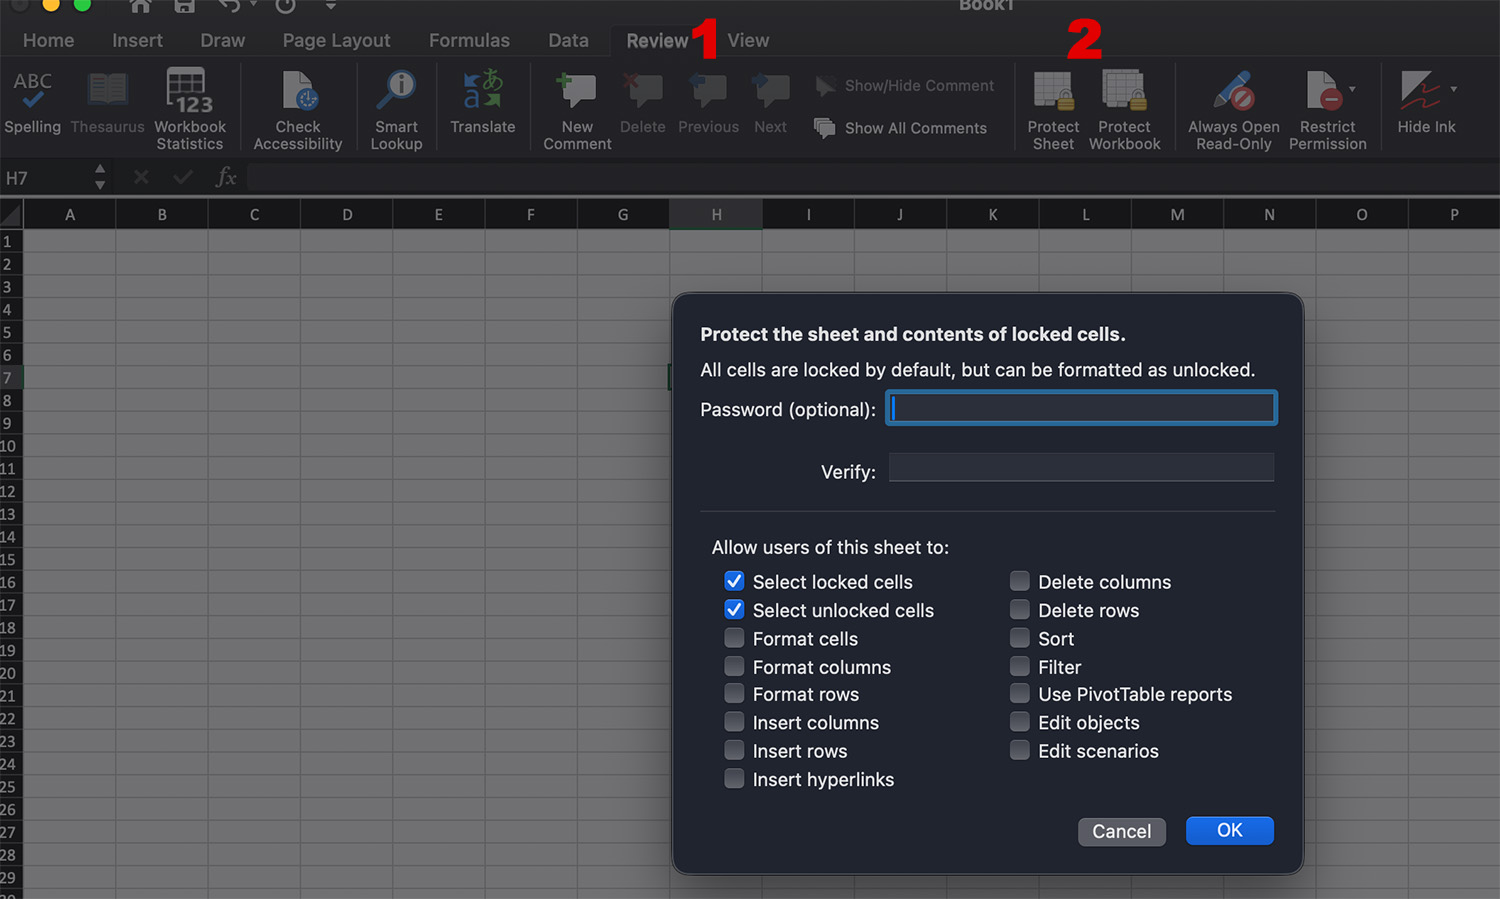
Step 5: Set a Password (Optional)
- Enter a password if you want to restrict access
- Leave it blank if you only want to prevent accidental edits
Step 6: Choose Permissions
You can allow specific actions such as:
- Selecting locked or unlocked cells
- Formatting cells
- Sorting or filtering data
Step 7: Click OK
If you set a password, confirm it. Your worksheet is now protected.
How to Lock and Unlock Specific Cells
By default, all cells in Excel are locked—but this only takes effect after enabling sheet protection.
To Allow Editing in Certain Cells:
- Select the cells you want users to edit
- Right-click and choose Format Cells
- Go to the Protection tab
- Uncheck Locked
- Click OK
- Now protect the sheet
Only the unlocked cells will be editable.
How to Protect a Workbook in Excel
Workbook protection ensures that users cannot change the structure of your file.
Step 1: Open Your Workbook
Step 2: Go to the Review Tab
Step 3: Click “Protect Workbook”
Step 4: Enter a Password (Optional)
Step 5: Select “Structure”
This prevents:
- Adding new sheets
- Deleting sheets
- Renaming sheets
Step 6: Click OK
Your workbook structure is now protected.
How to Unprotect a Worksheet or Workbook
If you need to make changes later, you can remove protection easily.
To Unprotect a Worksheet:
- Go to the Review tab
- Click Unprotect Sheet
- Enter the password (if required)
To Unprotect a Workbook:
- Go to the Review tab
- Click Protect Workbook again
- Enter the password if prompted
Protecting Excel Files with Password Encryption
For stronger security, you can encrypt the entire Excel file.
Steps to Encrypt a Workbook:
- Click File
- Select Info
- Click Protect Workbook
- Choose Encrypt with Password
- Enter a password and confirm
This prevents anyone from opening the file without the password.
Best Practices for Excel Protection
To maximize security and usability, keep these tips in mind:
- Use strong, memorable passwords
- Keep a backup copy of your file
- Clearly label editable cells for users
- Avoid over-restricting if collaboration is needed
- Combine worksheet protection with file encryption for sensitive data
Common Limitations of Excel Protection
While Excel protection is useful, it’s not foolproof. Keep in mind:
- It is designed more for preventing accidental changes than advanced security
- Skilled users may bypass weak protection methods
- Password recovery is difficult if forgotten
For highly sensitive data, consider additional security measures outside Excel.
Conclusion
Knowing how to protect workbooks and worksheets in Excel is an essential skill for anyone working with spreadsheets. By using worksheet protection, workbook structure protection, and file encryption, you can safeguard your data and maintain control over how your files are used.
Whether you’re creating reports, managing budgets, or sharing templates, these protection features help ensure your work stays accurate, secure, and professional.
Read Also: Trendlines and Forecasting in Excel (Step-by-Step Guide for Beginners)